Have you ever built a site on Google Sites only to find it’s blocked in schools, offices, or even certain countries? You’re not alone. Many students, teachers, and small business owners face this issue.
The good news? You don’t need Google Sites at all. You can create a professional, unblocked website that works almost everywhere using other free or low-cost tools. In this guide, I’ll show you step by step how to make a unblocked website without Google Site, explain why websites get blocked, and share strategies to keep your site accessible.
This is not about teaching people to bypass restrictions. Instead, it’s about helping site owners build safe, accessible, and trustworthy websites that are less likely to be blocked in the first place.
Quick Checklist (At-a-Glance)
Here’s a simple roadmap before we dive deeper:
- Pick a reputable host (Netlify, GitHub Pages, Hostinger, or WordPress).
- Use your own custom domain (.com, .org, .net preferred).
- Enable SSL (https://) for security.
- Add a CDN like Cloudflare for global access.
- Keep design lightweight and free from suspicious scripts.
- Add trust pages (About, Privacy Policy, Contact).
- Test your site on multiple networks.
- If blocked, request whitelisting from the network admin.
Why Do Websites Get Blocked?
Before learning how to prevent blocks, let’s understand why it happens.
Schools, offices, and even governments often use filters. Here are the most common reasons:
- Category-based blocking – Sites with adult, gambling, or gaming content are usually blacklisted.
- Security risks – If a website doesn’t use SSL (https://), filters may flag it as unsafe.
- Domain reputation – Free subdomains like
example.weebly.comorfreeweb.xyzare often blocked because many spammers use them. - Suspicious scripts – Too many ads, trackers, or third-party embeds can trigger firewalls.
- Legal compliance – For example, U.S. schools follow CIPA rules that block harmful content.
👉 Fact: According to Statista, around 26% of U.S. workplaces block certain websites to protect productivity and security.
So, if you want your website to stay accessible, you must design it to look trustworthy and safe to both users and network admins.
Step 1: Choose the Right Platform (Skip Google Sites)
Google Sites is free, but it’s often filtered on school and corporate networks. Instead, you have better options:
✅ Static Site Hosts (GitHub Pages, Netlify, Vercel)
- Free hosting with your own custom domain.
- Super-fast because they use global CDNs.
- Firewalls are less likely to block traffic since it comes from trusted IPs.
- Example: A student portfolio on Netlify with domain
myportfolio.comis far more likely to pass filters thanmysite.google.com.

✅ WordPress (Self-Hosted)
Works well with SEO plugins (like Yoast SEO or RankMath).
Popular choice for blogs, portfolios, or small businesses.
Costs a little (domain + hosting), but you get full control.
✅ Managed Website Builders (Squarespace, Wix, Hostinger Builder)
- Paid, but beginner-friendly.
- These platforms have high domain reputation, making your site less suspicious.
👉 If you’re new, I recommend starting with Netlify or GitHub Pages (free + easy). If you want more features, go with WordPress hosting.
Step 2: Get a Custom Domain (Skip Free Subdomains)
This step is crucial. Free subdomains (.google.com, .blogspot.com, etc.) are often blocked.
Instead:
- Buy a domain like
yourname.comfrom registrars such as Namecheap or GoDaddy. - Use standard TLDs:
.com,.org,.net→ These are seen as more trustworthy. - Avoid spammy-looking names like
bestfreemovies123.com.
Example: A teacher creating a class site should prefer mrjohnsonclass.com over mrjohnson.freehost.site. The first looks professional and has a much higher chance that email providers will whitelist it.
Step 3: Hosting, SSL & CDN Setup
A secure setup improves both SEO and accessibility.
- Hosting → Pick a provider like Hostinger, Bluehost, or Netlify.
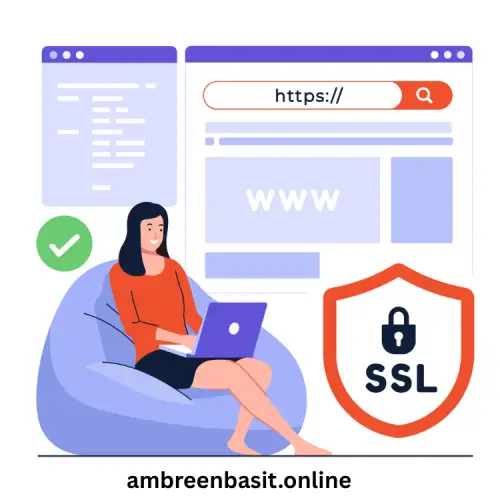
- SSL Certificate → Free from Let’s Encrypt. This gives your site the secure padlock (https://).
- CDN (Content Delivery Network) → Cloudflare is free. It improves speed and reduces block chances by serving content from trusted IPs.
👉According to Google, HTTPS now encrypts over 95% of web traffic in Chrome. If your site doesn’t have SSL, Chrome flags it as “Not Secure” which lowers trust.
Step 4: Keep Content Safe and Simple
Your design matters. To reduce block chances:
- Avoid auto-play videos or suspicious pop-ups.
- Don’t overload your site with third-party ads.
- Keep text readable, images optimized, and code clean.
- Add essential pages: About, Privacy Policy, Terms of Use. These pages show legitimacy.
Example: A whitelist is much more likely to include a student project site with “About the Project” and “Contact the Teacher” than a barebones site full of pop-ups.
Step 5: Smart Use of Embeds & Widgets
Many blocked websites contain unsafe widgets. Be careful with:
❌ Too many YouTube embeds (some networks block YouTube).
❌ Free comment plugins with trackers.
❌ Sketchy ad networks.
Instead:
- Host videos on your server or use trusted CDNs.
- Use simple contact forms (like Formspree or Netlify forms).
- Embed PDFs or images instead of external players when possible.
Step 6: Test Your Site for Accessibility
Before sharing your link, test it on multiple networks.
- Use Geopeeker or Uptrends to see how your site loads worldwide.
- Ask a friend on school WiFi or office network to check.
- Use command-line check:
curl -I https://yourdomain.com(shows if HTTPS is working).
Keep a log of tests and screenshots. This will help if you need to request a whitelist.
Step 7: Request Whitelisting (Professional Way)
If your site still gets blocked, don’t panic. You can politely request your school or office IT team to whitelist it.
Here’s a sample email you can send:
Subject: Request to Whitelist https://yourdomain.com

Hello [IT Admin Name],

I’m [Your Name], and I’ve created a small website for [class resources / project portfolio / business info].
The site is hosted on [Host Name] with HTTPS enabled. It contains only safe content (About, Contact, Resources).

Could you please review and whitelist it for [network name]?
Here are the main links: [link1], [link2].

Thank you for your support.

Best regards,
[Your Name]
👉 A polite request works much better than trying to bypass filters.
Troubleshooting Common Issues
- Problem: “My site is flagged as insecure.”
✔ Solution: Check SSL certificate and renew via Let’s Encrypt. - Problem: “Some images or scripts don’t load.”
✔ Solution: Host them locally instead of third-party sources. - Problem: “Free host domain is blocked.”
✔ Solution: Move to a custom domain on a reputable host.
Quick Tutorial: Publish a Static Site on Netlify (Example)
Here’s how you can set up a free, unblocked site in 5 minutes:
- Sign up at Netlify.
- Drag and drop your
index.htmlfile into the dashboard. - Netlify assigns a temporary URL (e.g.,
mysite.netlify.app). - Connect your custom domain (e.g.,
myproject.com). - Enable HTTPS in settings.
- Test on school/office network.
That’s it! You now have a professional-looking site, without Google Sites.
FAQs :
Q: How to make blocked websites unblocked?
If you own the website, make it more whitelist-friendly: use HTTPS, a custom domain, and clean hosting. If you’re just trying to access blocked sites as a user, always follow your institution’s rules.
Q: How can I unblock a Google Site?
You can request your IT admin to whitelist it. Or better, export your content and host it on Netlify or WordPress with a custom domain.
Q: Why do some system blocke websites?
Systems block websites due to security risks, spammy content, or legal compliance. Using trusted domains and clean design reduces the chance that systems will block your site.
👉 If you’re curious about different hosting choices and costs, I’ve shared a guide that breaks down what agencies charge and which features actually matter for beginners. Take a look at this hosting guide.
Final Thoughts
Creating a unblocked website without Google Site is not complicated. With the right hosting, domain, SSL, and clean design, you can publish a safe and professional site that stays accessible across networks.
Remember:
- Always use a custom domain.
- Keep your site secure with SSL + CDN.
- Add trust signals (About, Privacy, Contact).
- If blocked, request whitelisting instead of looking for hacks.
By following these steps, you’ll not only reduce the chance that search engines will block your site but also improve your SEO ranking, trust, and user experience.
And if you’d like to explore more helpful guides, visit my website for practical tips on SEO, websites, and digital growth.
✨ Now, you’ve got a complete roadmap to build your own unblocked website without Google Sites.


2 Responses